Trailer Step Plans
Our tent trailer doesn’t have a step built in, so we had been using a fold-up plastic step. Unfortunately, our cute little red step collapsed on us last camping trip, so we decided to make a new one.
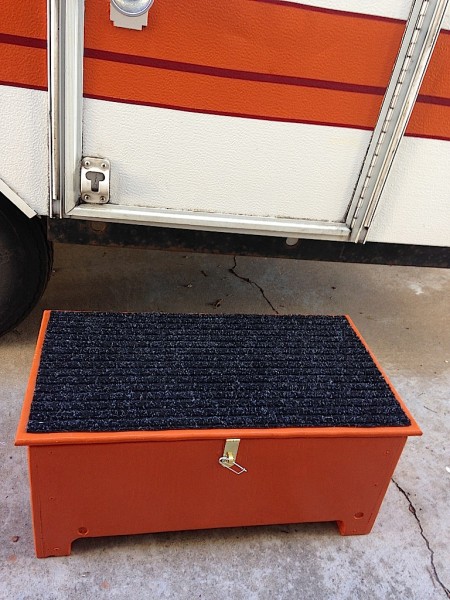
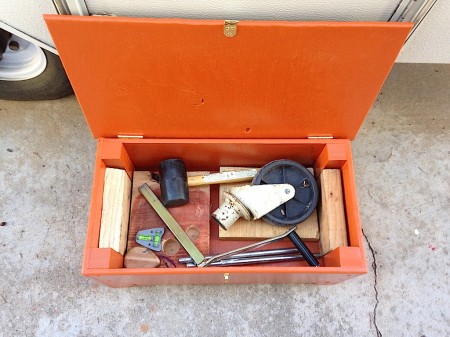
We made a trailer step that could double as a toolbox.
Read more for the plans to build one of your own and more pictures.
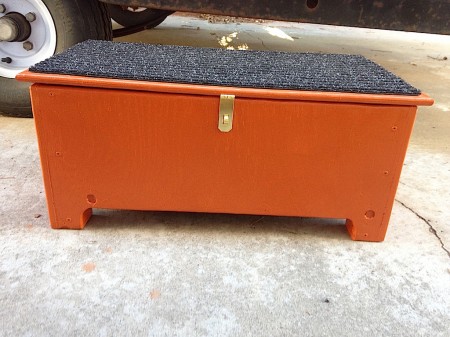
Here is a view from the front.
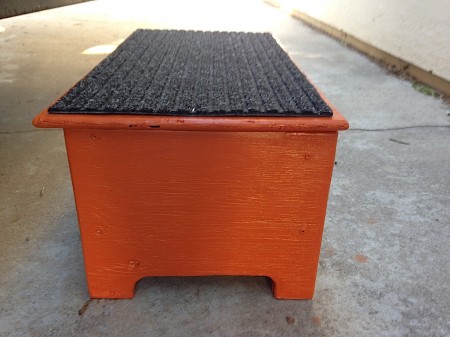
Here is the side view.
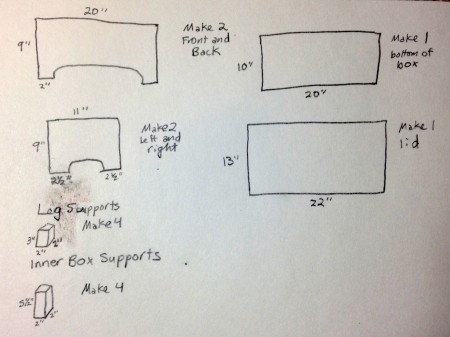
Here is the plan for the pieces of wood you need to cut out.
Materials:
- Plywood (about half a sheet)
- 2X2 (about half a plank)
- 1″ wood screws (about 40)
- Sand paper or sanding blocks (80 and 120 grit)
- Paint (exterior latex high gloss)
- 2 Hinges
- One latch
- One door mat
- Staples for the staple gun
Tools
- Pencil
- Band saw or jig saw to cut the wood
- Drill
- Screwdriver
- Router to round off the edges (optional)
- Rotary sander (optional)
- Paint brushes
- Scissors
- Staple gun
Directions
- With the pencil, mark on the plywood the pieces of the step. Mark on the 2X2 the measurements for the leg supports and inner box supports.
- Cut out the pieces with a band saw or jig saw.
- Attach the four leg supports onto the bottom of the box. Place them under the bottom of the box in each of the corners and drill a hole for each screw. Screw in two screws per leg through the bottom of the box into the leg supports.
- Attach the front and back of the box. Lie the box on its side and put the front of the box in place. Pre-drill and screw in a screw through the front into a leg support on the left and right. Do the same for the back of the box.
- Attach the left and right sides of the box. Lie the box on its side and put the left side of the box in place. Pre-drill and screw in a screw through the back and front leg supports. Do the same for the right side.
- Attach the inner box supports. Place the larger 2X2 pieces inside the box in each corner. Pre-drill and screw through the front and sides to attach the box to the inner supports. Use four screws in each one.
- (Optional) Use the router to round the edges. Round all the exposed edges with the router.
- Sand the box to remove splinters and prepare it for paint.
- Paint the box and lid.
- Cut the door mat to fit the top of the lid. (20″X11″)
- Staple the door mat onto the top of the lid with the staple gun.
- Attach the lid with hinges.
- Attach the latch to the front.
I wish I had taken pictures while we were in process, but I didn’t even know if this project would work. In fact, we had to cut the left and right legs THREE times because I had forgotten that wood has WIDTH. At first the left and right legs weren’t wide enough and then I also forgot to make the little legs at the bottom wider to accommodate the width. I’m sure I’ll do better on my next project, but I’m pretty dang proud of this one. Hope you like it!
Hi Laura, I run DoItYourselfRV and was wondering if it would be OK to feature your trailer step project on our website? Of course we would provide full credit to you and link back. Thank you, Eric
Comment by Eric Mikowski — May 16, 2015 @ 9:49 am
This is great, and it’s great of you to share it. Someone on my camping group on Facebook posted this, and you’re getting tons of compliments and wow!s over there.
Comment by heather — February 10, 2016 @ 1:11 pm
Hi, I’ve just started making the same thing, before I saw yours. Only difference, I’ve used marine ply, with a special coating used for children’s play ground purposes. I’ve put foam rubber layer on the bottom to help make it feel a bit softer etc when stepping out of my caravan. Using mine to store the shoes and keep rain off. I didn’t have the outdoor mat, but seeing yours will try and find the same, and glue it on. Many thanks
Comment by Mark — September 25, 2019 @ 1:45 am
Love this! Easy build, easy directions. Thank you!
Comment by Kathy — March 23, 2023 @ 4:32 pm