Starling Travel

March 3, 2012

Trailorboat: A Rare Glimpse on eBay

Filed under: Camping,Teardrops & Tiny Trailers — Laura Moncur @ 10:11 am

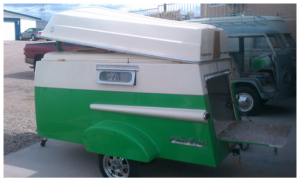
I was trolling the eBay listings today and I found this amazing Trailorboat:

I had heard about the Trailorboat, from these sites about teardrop trailers:

It was an ingenious design manufactured from 1961-1963 that incorporated a boat on the roof of a tiny trailer, making it easier to haul. The photos of these trailers have been few and far between, so seeing this beauty on eBay is a rare treat.

Continue reading to see the rest of the photos: (Continue Reading…)

February 26, 2012

Vintage Camping from Cheryl R. Gonzalez

Filed under: Camping,Teardrops & Tiny Trailers — Laura Moncur @ 10:02 am

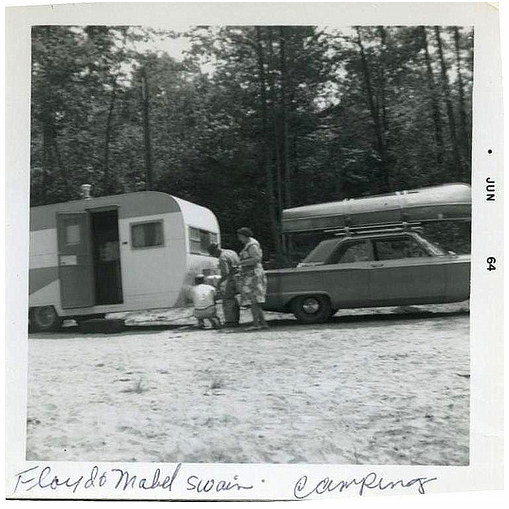
Cheryl R. Gonzalez has a huge photo collection of her vintage trailers and restoration projects, but this photo of her great uncle and aunt camping really touched my heart.

Floyd & Mabel Swain Camping 1964 by Cheryl R. Gonzalez from Flickr

I can imagine how this photo was taken. It’s obvious that they are focused on hitching up (or off) the trailer. This process took so long that the photographer got bored, found the camera and snapped a photo. Once again, I’m reminded that having a trailer wouldn’t save me any time or work. It would just exchange it for different work.

On another note, I absolutely ADORE Mabel for wearing a dress while camping. I have a bunch of little skorts that I wear camping and people always look at me funny at the campsites. I feel a strange bond with Mabel across the generations. Way to go, girl!

February 23, 2012

Teal Camper: Ugly But So Ingenious

Filed under: Camping,Teardrops & Tiny Trailers — Laura Moncur @ 12:15 pm

I was watching a video about A Frame trailers and this video from Teal Camper came up as a related video.

I was shocked at the ingenious design! You provide your own trailer, like the bolt together 4′ X 8′ frame from Harbor Freight and they ship the parts to you to create your own camper using only a screwdriver (preferably electric).

The Teal Camper Owners Manual shows you every step in how to put your camper together either on a utility trailer or on the back of a pickup truck.

Because the parts are modular, you can make your camper as big or as small as you want. In fact, there is even a design for making a 8′ X 8′ shelter. Here is a video walkthrough of it.

Here is a video tour of the 4′ X 8′ camper:

If you want a bigger camper, here is the 5′ X 10′ design:

Unfortunately, when I checked the Teal Camper Pricing Page, their online store is temporarily closed. They say they are negotiating with a new manufacturer, so you can’t order them right now without contacting them personally.

What Teal Camper lacks in beauty, it more than makes up for in flexible design and DYI ingenuity. I hope they are successful enough to move beyond their awkward appearance and are able to design a camper that is both modular AND beautiful.

February 20, 2012

The Jack Sisemore Traveland RV Museum

Filed under: Camping,Places To Visit,Texas — Laura Moncur @ 9:21 am

The first thing I thought when I saw the website for the Jack Sisemore Traveland RV Museum was,

“I want to go to there.”

I realized that I don’t want to haul an RV across the country when I can just throw a tent in the hatchback, but I DO want to look at the old RVs. They are beautiful to me and I love to see them lovingly restored or in their original condition.

Among their many lovely RVs, they have the Gornicke’s Bus that followed Robin Williams’ family across the country in the movie RV. I wrote about that movie earlier here:

I wish they also had the damaged and waterlogged RV that Robin Williams’ family rented, The Rolling Turd. Seeing them side by side would be like stepping into the movie.

The museum is in Amarillo, Texas, so it’s quite the drive for Mike and I to take to see it. Here is the contact information:

Jack Sisemore Traveland RV Museum
Phone: 806-358-4891
4341 Canyon Drive, Amarillo, TX
Admission: FREE!
Hours: Monday – Saturday 9am-5pm

The museum is free to the public and appears to be the collection of the owners of Sisemore Traveland RV Sales.

Via: Texas RVer: Amarillo hosts free RV museum

Photo Via: Jack Sisemore Traveland RV Museum

February 12, 2012

DoubleBack Camper Van

Filed under: Camping,Teardrops & Tiny Trailers — Laura Moncur @ 10:22 am

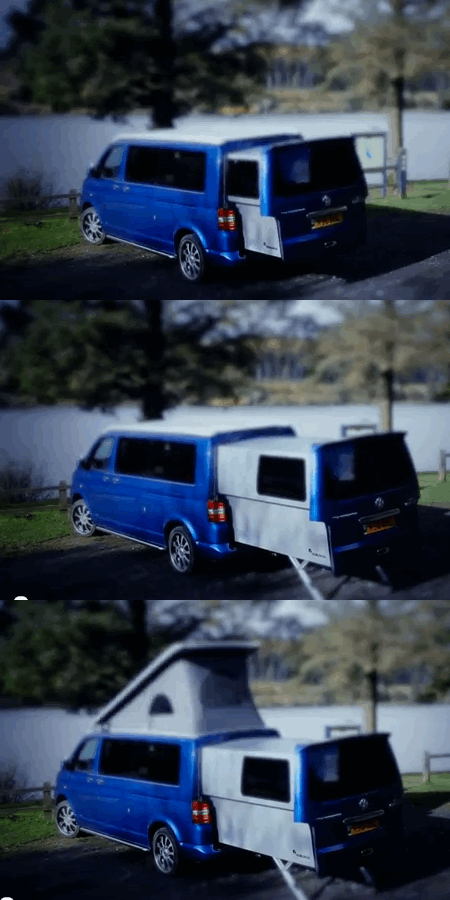
It’s unavailable in the States, but the DoubleBack Camper Van looks like the best thing to happen to the camper van since Westfalia started converting VW buses. Not only does it have the lift roof like the old conversions, the back of the van expands, doubling the indoor space.

Here is a video describing it from BikeRadar:

The cost for this van is approximately $87,000. For that price you could buy a tow vehicle and FOUR bumper tow trailers with full RV capabilities and more space inside. This van is cool for its ability to transform like an Autobot, but you end up paying quite a bit for that feature.

If you want something that will fold up nice and small in the back of your VW van (or even your VW Beetle), nothing beats a tent.

Via: Gizmodo – Extending Camper Vans Give the Modern Hippy Plenty Of Leg Room

February 5, 2012

RV: Another Reason I’ll Stick With The Tent

Filed under: Camping — Laura Moncur @ 10:00 am

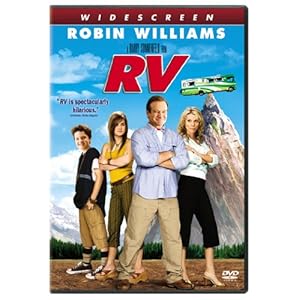
RV (Widescreen Edition) (2006) at Amazon.comRV with Robin Williams was recommended to me by a RV salesman in Nevada. He said,

“Now, you want to make sure that you open the black water valve BEFORE you turn on the water flush. Otherwise, you’ll be like Robin Williams in that movie.”

I had heard of the movie, but it looked beyond stupid to me, so I never watched it. He was talking about this scene:

To be honest the absolute stupidest scene in that movie is that one. It’s the most slapstick and the one that really plays up the gross factor. Other than that, the movie was surprisingly good. Partly because I was expecting a movie on par with the worst of Adam Sandler, I was pleased that it was merely mediocre. Will Arnett, Jeff Williams and Kristin Chenoweth all have cameos that are a joy to watch. In the end, I wanted to be part of the Gornicke family and ride along in their red and white bus.

There is a scene where Robin Williams and his family are trying to leave early in the morning to avoid the Gornickes. Watching them trying to pack up and go reminded me that camping in an RV is just as hard as in a tent. Not only do you have to remove the wheel blocks, you have to draw in the slide in and pull in the awning. And the movie didn’t even show them unhooking the RV from the hookups.

I always imagine camping in an RV would make things EASIER. All I’d have to do is drive up and park. No matter how many times I tell myself that it takes an RVer just as long to set up as Mike and I pitching our tent, I STILL have this image that taking an RV is easier. It was nice to see a movie that reiterates the fact that camping with an RV isn’t less work. It’s just DIFFERENT work.

February 4, 2012

How To Set Up the Portal/Cabela’s Mega Camp Kitchen

Filed under: Camping — Laura Moncur @ 10:00 am

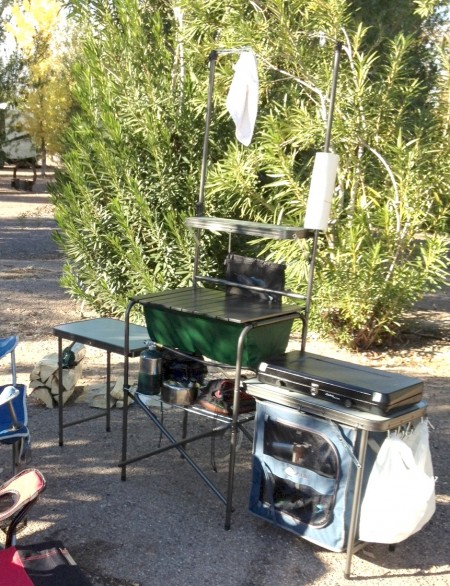
Mega Camp KitchenI’ve talked about my beloved Mega Camp Kitchen before.

Back then, I said,

Having a camp kitchen might seem redundant when almost every campsite has a picnic table, and quite frankly it is, but there are so many times when we have needed the camp kitchen that the thought of camping without one is unpleasant now.

Camping at 3 Dreamers RV Park was one of those times when we needed a camp kitchen. Because they were an RV Park, not a campground, they didn’t have the usual picnic table at our site. The camp kitchen was perfect for us.

Here is a video showing how to set up the camp kitchen and the extra additions that we’ve made to it. These directions will work on the Mega Camp Kitchen With Closets at Sportsman’s Warehouse and the Cabela’s Standard Camp Kitchen.

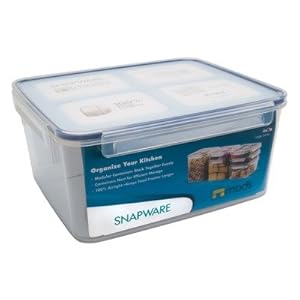
Snapware Rectangle 18.5 Cup at Amazon.comThe sink on this kitchen is really large, and is impossible to heat enough water in order to wash dishes properly, so we use two bins in them. They stack together nicely and we use one of them to store the propane so it doesn’t get damaged on the drive. The bins we use are the Snapware Rectangle 18.5 Cup Bin. We found them at our local grocery store, but it looks like Amazon has them for cheaper than we paid. I really love that the bins hold two cans of propane with an airtight lid, so if there is an accidental release in the car, we have a bit of protection.

Both the Cabela’s and the Portal kitchens come with TWO pantries that hang on each side. I just showed the one we use for our dishes. There is another one in which we keep our food, but we don’t bring it outside and hang it on the camp kitchen because we don’t want the local critters to steal our food, or gnaw their way into our pantry.

The paper towels on the holder worked just fine this trip and we’ll probably use that holder from now on instead of putting them through the lantern holders like we used to. I didn’t show it, but we always keep a rubber band around our paper towels to keep them from unrolling in the wind. That has worked really well for us as long as we remember to replace the rubber band after using the towels.

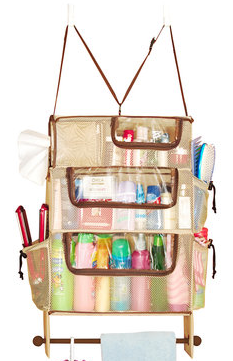
Pro-Mart RV Bathroom OrganizerThe upper pantry that we added was purchased at Walmart, here is the link: Pro-Mart RV Bathroom Organizer at Walmart. We cut off the towel holder at the bottom and then I cut the long strap on the top and used it to sew two small loops on each side. The metal strip was a couple of dollars at the local hardware store and I cut it to size with a hack saw. I drilled the holes with a normal drill and a bit made for drilling through metal. It was a lot easier than I thought it was going to be to make this addition and I did it all in one day.

I absolutely adore this camp kitchen because it has made every campsite feel like home. There is a space where I can cook and all my dishes are exactly where they usually are every time we go camping. Next time you are planning a trip, consider getting yourself a camp kitchen and see if it helps organize your cooking.

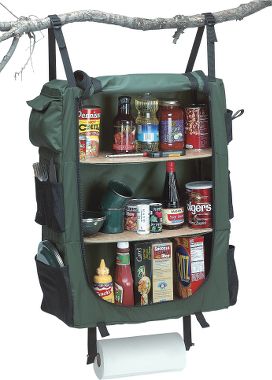
Creek Company Camp CupboardUpdate 06-22-12: You can also use this Creek Company Hanging Camp Cupboard instead. It’s a little easier to find on the Cabela’s website than the other organizer and it uses the upper space more effectively. Thanks to Lisa Sperle on Pinterest for bringing that to my attention.

February 2, 2012

How To Set Up a Springbar Traveler 5 Tent

Filed under: Camping — Laura Moncur @ 10:00 am

While we were staying in Arizona last month, Mike and I filmed the setup of our Traveler 5 tent from Springbar. I put it all up by myself in about thirty minutes. This video gives you a bunch of tips on how to put up the tent.

Stanley 51-505 Fatmax 16-Oz Curve Claw Graphite Hammer at Amazon.comI talked about the Stanley Fatmax Hammer in this video. It has been a great hammer for pounding in the stakes because the head is bigger.

Kirkham’s are pretty good and have videos that show how to put up the tent, but they are so perfect and skip a lot of the work of putting it up, so I wanted to include the whole story so you could get a good idea of how long it takes to put up.

On another note, it was only the second time I had put the tent up all by myself, so it was a little more difficult than I thought it would be. I was actually quite proud of myself that I got it up in about a half hour. We’ve been really happy with this tent and I’m so glad we bought it!

February 1, 2012

Barbie Star Traveler: The Beginnings of My Camper Obsession

Filed under: Camping,Teardrops & Tiny Trailers — Laura Moncur @ 10:00 am

Here is the television commercial for the Barbie Star Traveler:

If it hadn’t been for this toy, I wouldn’t be struggling with my trailer and motor home obsession right now.

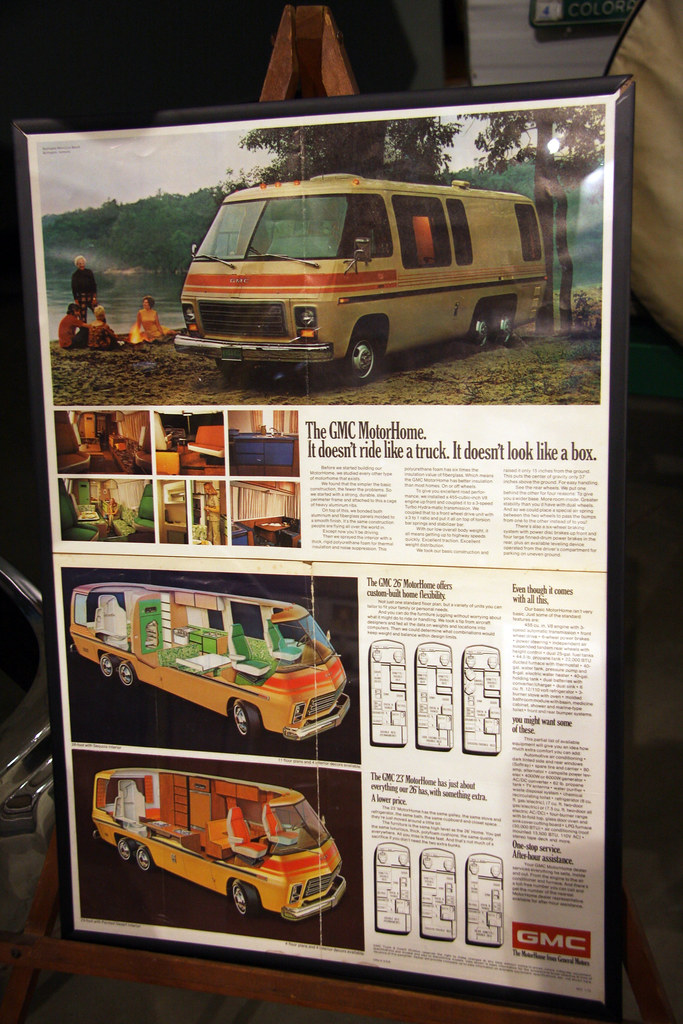
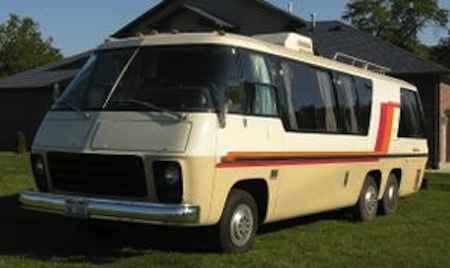
This toy was a replica of the GMC Eleganza II. You can see a brochure reproduction here:

The GMC MotorHome by  When lost in.... from Flickr

Here is a picture of one looking so much like the Barbie Star Traveler that I want it for myself.

GMC Eleganza II

Mike and I saw one of these for sale in Quartzsite, AZ and I took a walk through it. The minute I climbed aboard, I wanted it. The back area had twin bunks with a dresser between them, so it wouldn’t have worked for us. Not to mention the fact that Mike wouldn’t let me even ask the price. The thought of trying to keep a 35 year old motor home running in perfect condition makes my skin crawl, actually.

In the end, we’re sticking with the tent and Prius just because the cost of the gasoline alone would curtail any adventures we’d be able to have in a motorhome, but the Barbie Star Traveler will always be my first motor home.

Update 12-27-12: Here is a video tour of a GMC Eleganza

January 30, 2012

A Better Cooler Experience

Filed under: Camping,Food — Laura Moncur @ 10:00 am

One of my least favorite things about ice chests (or coolers) is the ICE. I hate how it melts and leaves everything in the cooler wet. Anything in a Ziploc bag might end up soggy and ruined if the zip top fails to keep out the water.

Oh, and it’s COLD when I have to stick in my hand and root around for a soda.

Snapware 29 Cup 10X8X6 at Amazon.comThis last camping trip, we found a way to keep our food cold without the melted ice soaking our food. The idea started with the old-time icebox. Back then, they kept food cold by putting a large block of ice in the top area of the icebox. What if I could do the same with my ice chest?

Firstly, we needed a large plastic container. We used the Snapware 29 cup bin because it fit nicely into our smaller Igloo cooler and it had a handle at the top. You might have to choose a different size based on your cooler.
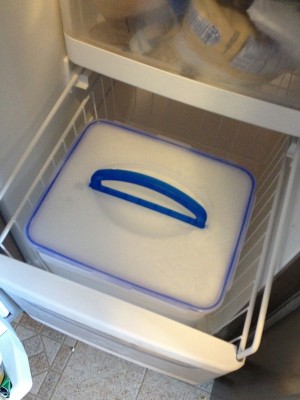
Snapware Ice Block in FreezerWe filled the Snapware box almost full of water and made room for it in our freezer. You want to leave at least a half inch room because ice expands and takes more room than water. Additionally, we left the lid a little open so it wouldn’t crack the plastic. It took well over two days for it to fully freeze, so you really need to plan ahead for your trip.

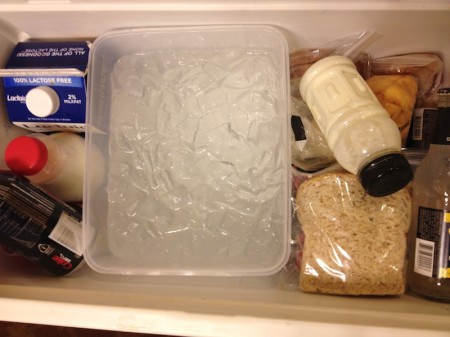
Once it was fully frozen, it looked like this. As you can see, I could have added at least an inch and a half more water when I froze it. If I had, the block might have lasted us longer.
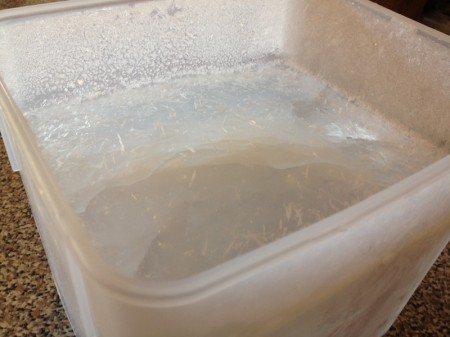
Snapware Ice Block Frozen

At this point, fill that last inch or so with water and put the box in the cooler. It will take up a lot of room, but remember, so does having a cooler full of ice. You want to position the block in the middle of the cooler and place the most perishable items nearest the block.
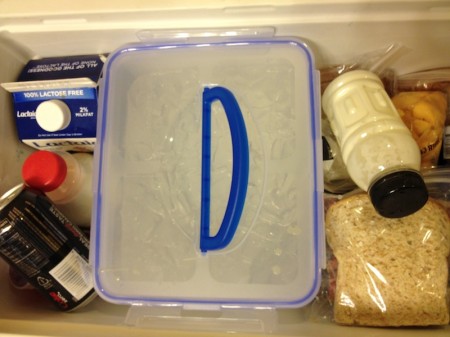
Snapware Ice Block in cooler

That block of ice lasted us a full five days driving to and camping in Quartzite, AZ a couple of weeks ago. The food wasn’t quite as cold as it would have been if it had been a cooler full of water and ice, but it lasted a LONG time. When the block is melting, don’t drain off the water. Water conducts the cold much better than air, so it will cool the items in your chest better if you keep the water. Once the block had fully melted, we had moved onto our hotel in Vegas, where we filled the Snapware with ice and water.
Snapware with ice and water in cooler

You want to fill it as full as you can with ice and add cold water. This will melt some of the ice, so add some more before putting your lid back on. Once again, you want the water as well as the ice because the water conducts the cold better than air. You can drain the water to add more ice, but make sure the entire box is filled with ice AND water. If you want to have ICE cold soda, you can put one or two cans in the Snapware container with the ice and water and it will be just as cold as a typical ice chest setup.

Snapware with ice and water and soda in cooler

Make sure you always reattach the lid so that the ice and water don’t splash out of the Snapware box while you’re driving or moving the chest.

What I’d really like to do with this concept is find a container that fits on the lip within the top of the cooler. It would need to be shallow and wide enough to cover the entire top. The old iceboxes had the block of ice at the top of the cooler, because cool air naturally travels downward. Having the ice along the entire top of the cooler would be better than in the middle, but I couldn’t find anything that fit so precisely.

I’m also considering adding a drain spout to this container so that we can have ice cold water to drink. It was kind of hard draining this box without just dumping the whole thing out.

Dear Ice Chest Manufacturers: Please make me a cooler where I can EASILY put the ice and water in the LID of the cooler and my food can stay protected from the water. Put a spout on one side of the lid, so I can drain ice cold water to drink that hasn’t been contaminated by my leaky ziploc bag of bacon. Make me three different sizes of coolers with this feature and I will buy them ALL! KTHNXBAI!

Next time you have a camping trip or vacation planned, take the time to freeze yourself a solid block of ice in a plastic container and you will have a cold cooler without the soggy mess.

Happy Traveling!
« Previous Page« Previous Entries - Next Entries »Next Page »

Powered by WordPress
(c) 2005-2017 Michael Moncur, Laura Moncur, and Starling Studios